How to Format SD Card on Mac in 2020

SD Cards need formatting if you are to use them in a new electronic device. Or even if you simply want to remove the data stored in the SD card, it requires formatting. If you have a Macbook, formatting an SD Card on Mac is super easy and convenient.
This article will outline the steps to be followed when formatting your SD Card or Micro SD Card on a Macbook. Let’s get started!
How to Format SD Card on Mac in 2020
Method 1: Use SD Card Formatter
To format SD card on Mac and Windows safely. You must need to download SD formatter to format SD/SDCH/SDXC and any memory card easily.
- First you need to download SD Card formatter.
- Download SD card formatter first.
- Install it on Mac and Windows as per steps.
- You can insert your memory card which you need to format.
- Check your SD card name on SD formatter tool.
- Click on Format button.
- After a while your SD card will be formatted by SD formatter tool.
- Eject your memory card.
Method 2: Regular Method (Bit hard to format SD card)
1. Getting Started
- When you format data on SD Card, it erases all the data. Thus, it is advisable to backup any files/data you want beforehand.
- It is important to be aware of the format Type you are going to perform, which will depend upon the size of SD Card and the OSX version you are running. For SD card size greater than 64GB and Mac Os Lion and greater, usually ExFAT is used. MS-DOS (FAT) can be used for earlier versions and smaller sizes. If you wish to have the SD Card compatible with other devices, do not select the OS Extended formats.
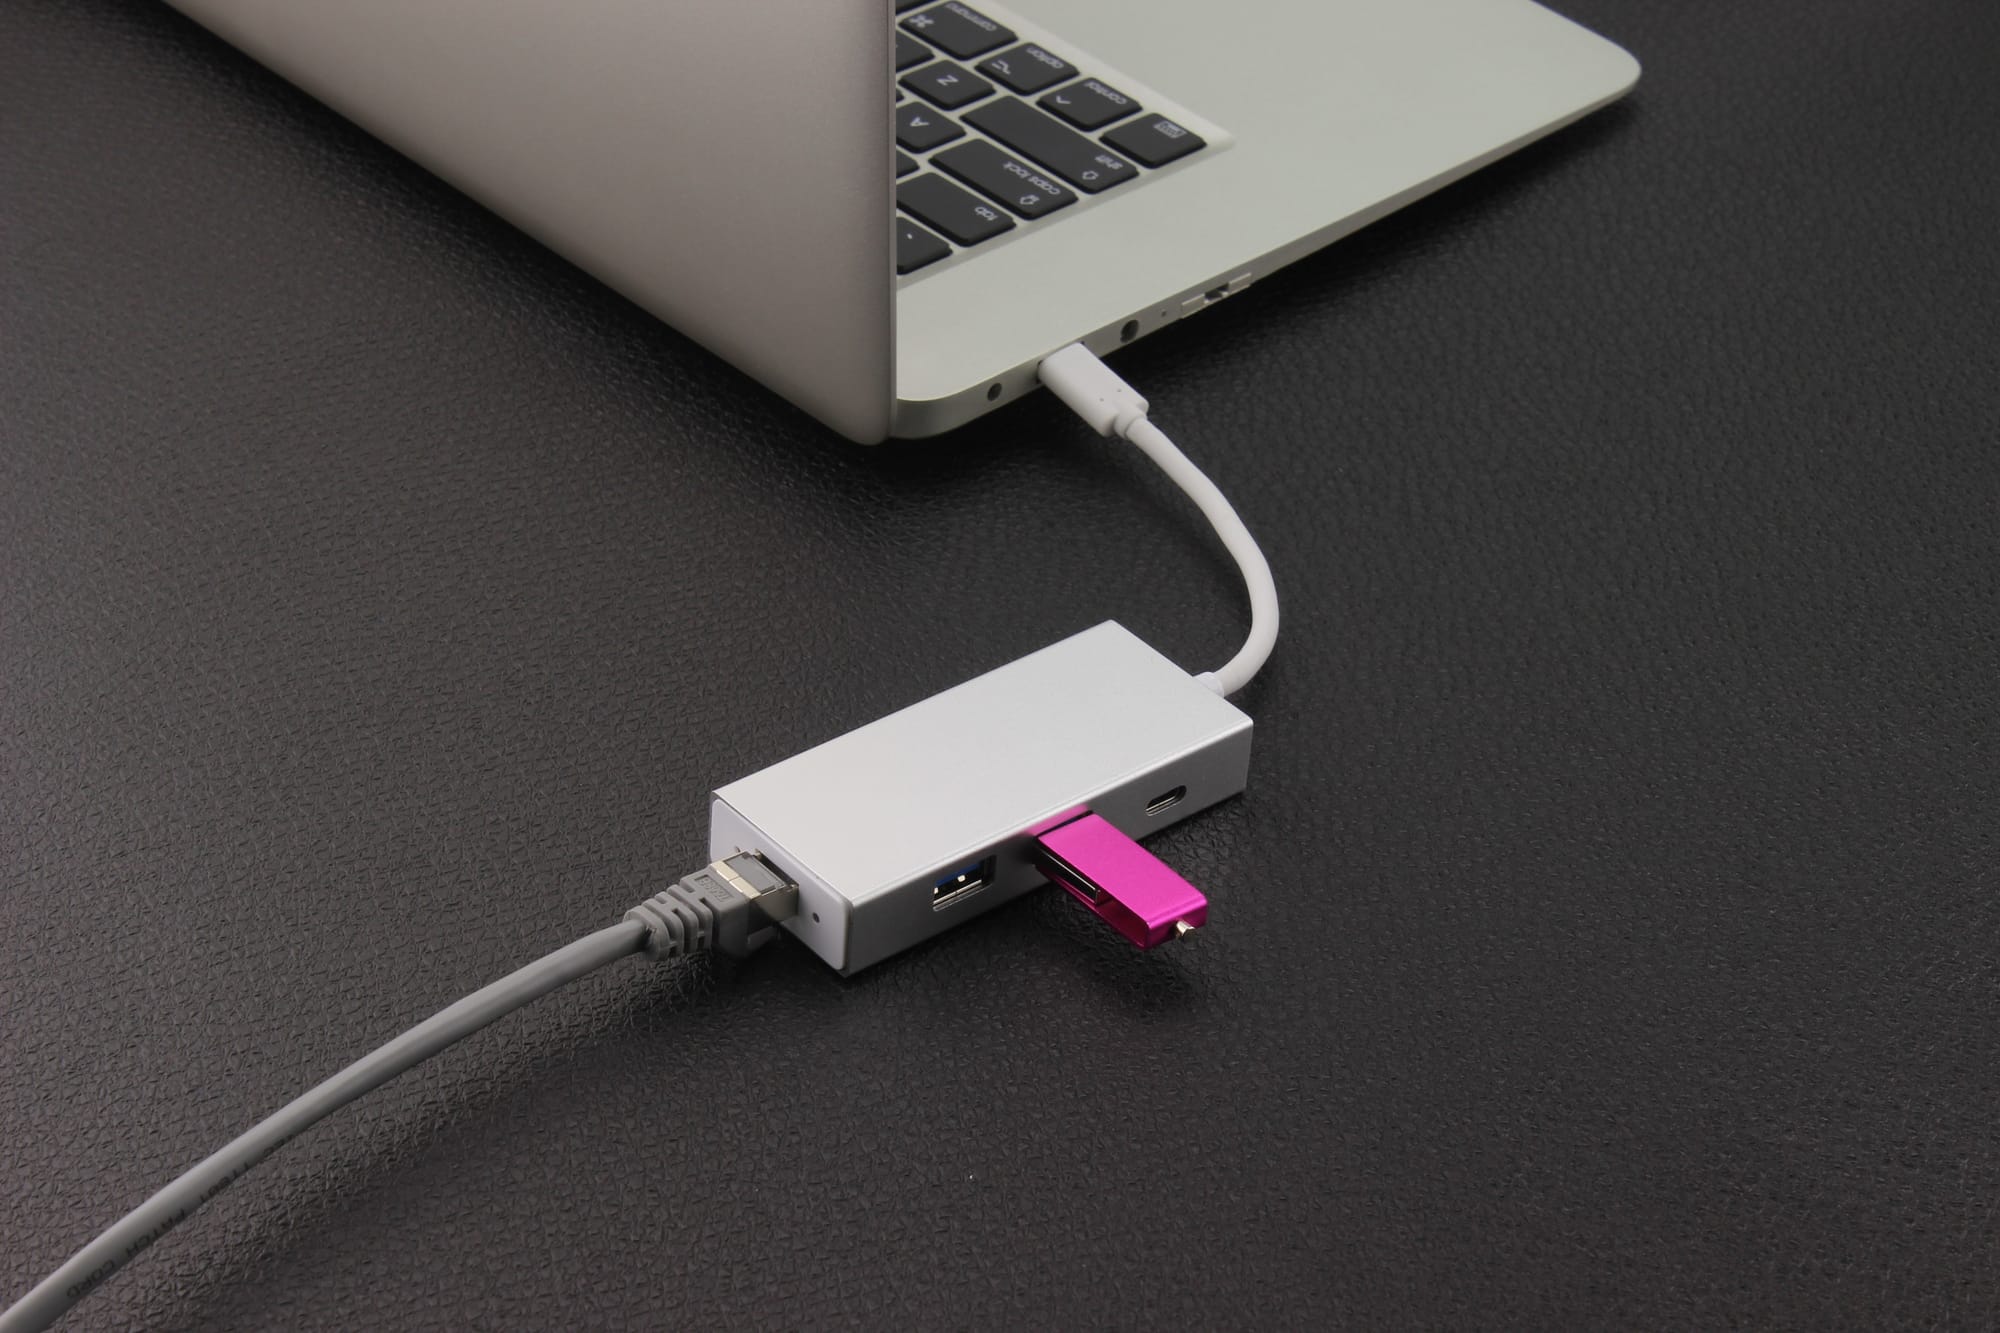
- Mac computers do not usually come with inbuilt SD card readers. Due to this, you will have to purchase an external accessory, a card reader that has slots for general SD cards and micro SD cards, available on online stores and retailers.
2. Connect the SD Card
Using the card reader, connect the SD Card with your Macbook.
3. Erasing/Formatting the Data
To format or clear the SD card, you don’t require any application or a ‘ SD Formatter’. This can be done very easily by the ‘Disk Utility‘ application as follows:
- Open Disk Utility from Macintosh HD/Applications/Utilities and run it.

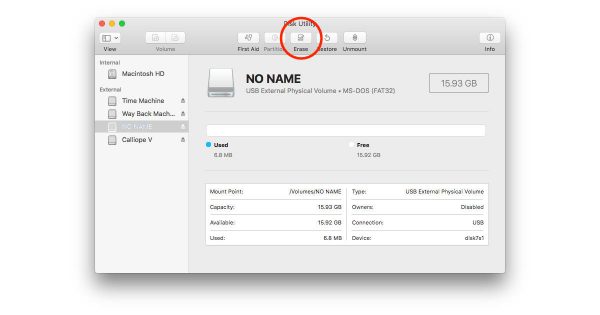
- In the left sidebar, locate the SD Card you wish to format, select it. Click on the Erase button in the upper toolbar.

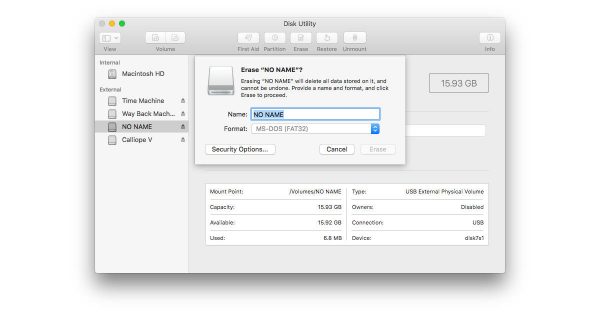
- You will be prompted by the app, once you click on Erase, to Enter the Name of the SD Card and the type of Format operation you wish to perform. Usually, ExFAT is used as it is compatible throughout a range of devices and hence convenient. Choose a Name, type of Format, and click Erase.

- The Format Process will happen, and once it is done, press Done to continue.
- That’s it! You’ve successfully erased your SD card.
4. Eject The SD Card
- After erasing, eject the SD Card by clicking the arrow icon next to the Name of the card in the Sidebar. The SD card will get ejected.
Final Words
I hope the article was relevant to your needs, and after reading this you were able to Format your SD Card On Mac, whether its a 64Gb or 128 GB SD Card, or if it’s a Micro SD Card.
The Type of Formatting is completely up to you, for your specific use, but if you are unsure it is best to go with ExFAT, or if not that, FAT-32.
If you have any further queries regarding formatting your SD Card, you can mention them down below. We will try our best to look into them to give you the best possible response.
That will be all for this article about How to Format SD Card on Mac. You can read more such articles on our website for information, tutorials etc. that might be of interest to you.


